
Dec 4, 2024
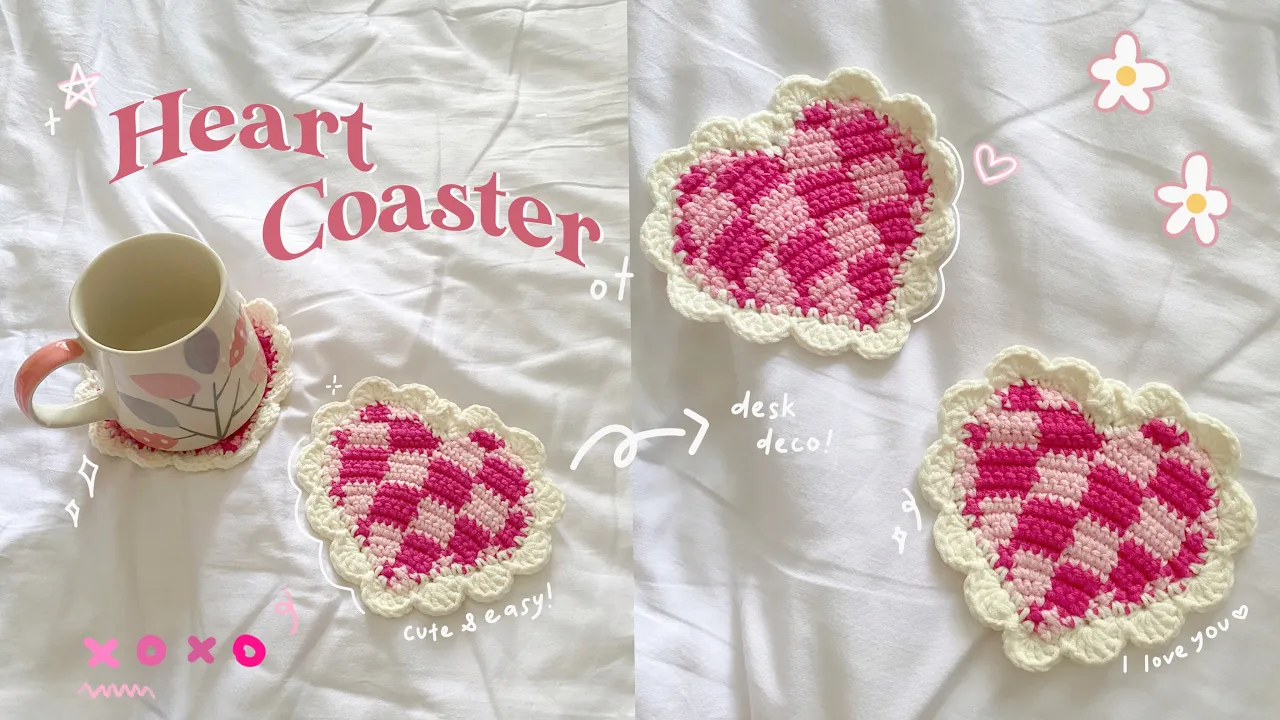
Crochet heart shape checkered coaster


For today’s project, I’m sharing a Heart Checkered Coaster pattern that I’ve been really excited about. It’s a small, easy make, but it turns out surprisingly cute the kind of thing that adds a little personality to your desk or coffee table without trying too hard!! The stitches are simple, and the checkered heart gives it a nice detail that looks good in almost any colour combination. It’s quick to finish, beginner-friendly (not suitable for absolute beginner), and a fun project if you want to use up leftover yarn or make a matching set. Grab your yarn and hook, and let’s make a coaster that’s both practical and adorable!
✿ Copyright
Please do not copy or redistribute this pattern as your own. This heart shape checkered coaster pattern belongs to me, @mucie.studio You may sell the finished items made using this pattern! Just please give me credit to help support me and my art. This will help me create more patterns for you in the future!
Watch the video below and crochet along with me! I recommend you watch the video while keeping the pattern open to make your crocheting process easier.
✿ Notes
‣ This pattern uses US terminology.
‣ We'll be changing colors for this pattern. I'll be using three colors for this pattern and I'll refer to it as Col A, Col B, and Col C.
✿ Materials
1. 5-ply yarn in three colors (I used light pink, magenta and white)
2. 4.00mm crochet hook
5. Darning needle
6. Scissors
✿ Stitches & Abbreviation
Ch: Chain
St(s): Stitches
Sc: Single crochet
Inc: Increase (put two single crochet in single stitch)
Dec: Decrease (single crochet two stitches together)
Sl st: Slip stitch
Hdc: Half double crochet
Dc: Double crochet
Tc: Triple (treble) crochet
♡ Heart shape checkered coaster pattern ♡
Heart shape
We're only going to be using Col A and Col B for the checkered pattern. Col A is going to be in the regular font and Col B is in a red font. I would suggest the yarn for Col A is in a lighter and Col B in a darker yarn.
Start with Col A, ch 3.
Round 1: In the 2nd ch, 1sc, 1sc
Round 2: Ch 1, Inc, Inc
Round 3: Ch 1, Inc, 1sc, 1sc, Inc
Rounc 4: Ch 1, Inc, 2sc, 2sc, Inc
Round 5: Ch 1, 1sc, Inc, 2sc, 2sc, Inc, 1sc
Round 6: Ch 1, Inc, 1sc, Inc, 2sc, 2sc, Inc, 1sc, Inc
Round 7: Ch 1, Inc, 1sc, 5sc, 5sc, 1sc, Inc
Round 8: Ch 1, 2sc, Inc, 5sc, 5sc, Inc, 2sc
Round 9: Ch 1, 1sc, Inc, 2sc, 5sc, 5sc, 2sc, Inc, 1sc
Round 10: Ch 1, Inc, 3sc, Inc, 5sc, 5sc, Inc, 3sc, Inc
Round 11: Ch 1, 2sc, 5sc, 5sc, 5sc, 5sc, 2sc
Round 12 - 14: Repeat round 11 but please work the single crochets according to the checkered colors.
Round 15: Ch 1, 2sc, 5sc, 5sc, 5sc, 5sc, 2sc
Round 16: Ch 1, Dec, 5sc, 5sc, 5sc, 5sc, Dec
For the left heart curve
For the curve you’re going to make it one by one. Meaning you’re going to make the left heart curve first then once you’re done making it you can continue with the right left heart curve. For extra guidance please refer to the video.
Round 1: Ch 1, Dec, 4sc, 4sc, sl st
Round 2: Ch 1, Dec (the last st and the sl st in R1), 3sc, 3sc, Dec
Round 3: Ch 1, Dec, 2sc, 2sc, Dec
Round 4: Ch 1, Dec, 1sc, 1sc, Dec
For the right heart curve
It is basically the same pattern as the left heart but just a different color placement. This is so that the checkered pattern turned out pretty.
Round 1: Ch 1, Dec, 4sc, 4sc, sl st
Round 2: Ch 1, Dec (the last st and the sl st in R1), 3sc, 3sc, Dec
Round 3: Ch 1, Dec, 2sc, 2sc, Dec
Round 4: Ch 1, Dec, 1sc, 1sc, Dec
Ruffles
★ I am using Col C for the ruffles. I recommend that you use white yarn for Col C.
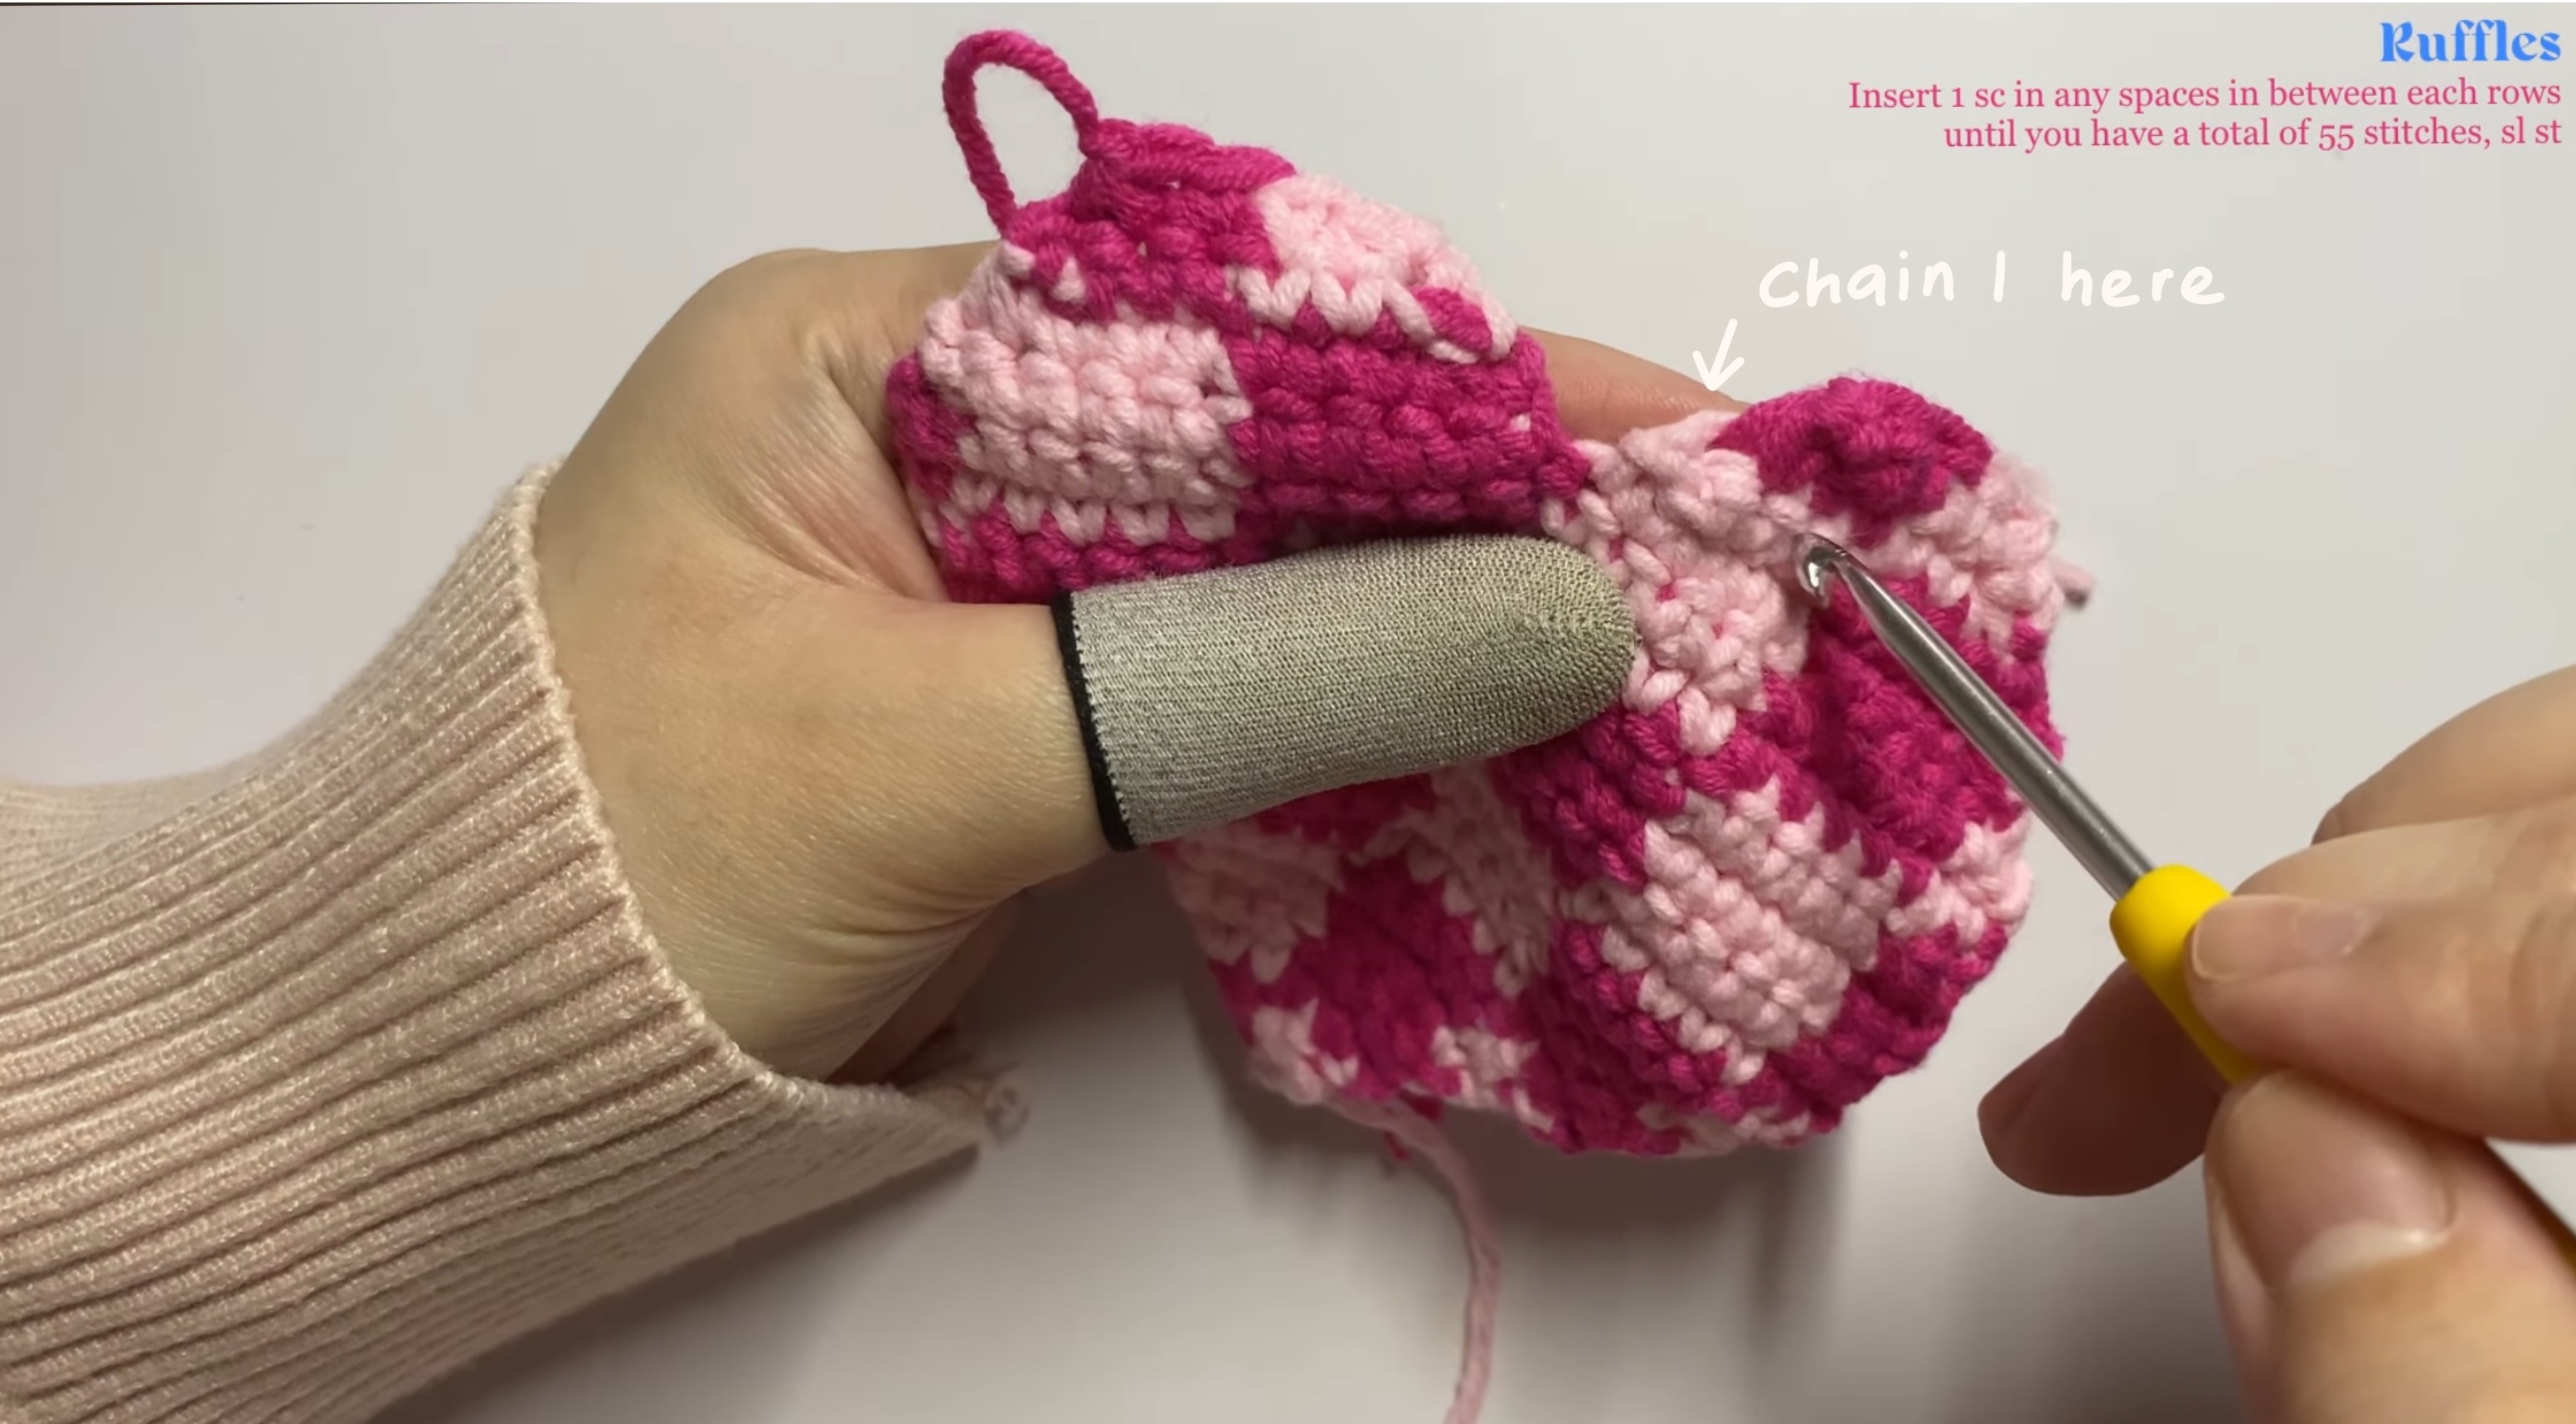
Round 1: To start, ch1 here then insert 1sc in the same st. Then just insert 1sc in each row all around, Sl St.
Round 2: Ch1, (sl st, skip, 6dc, skip, sl st) Repeat this step until the end of the round.
Fasten off and now you’re done!!
Latest crochet pattern!


You saw. You came. You crocheted.
Thank you for visiting!
