
Jun 14, 2026
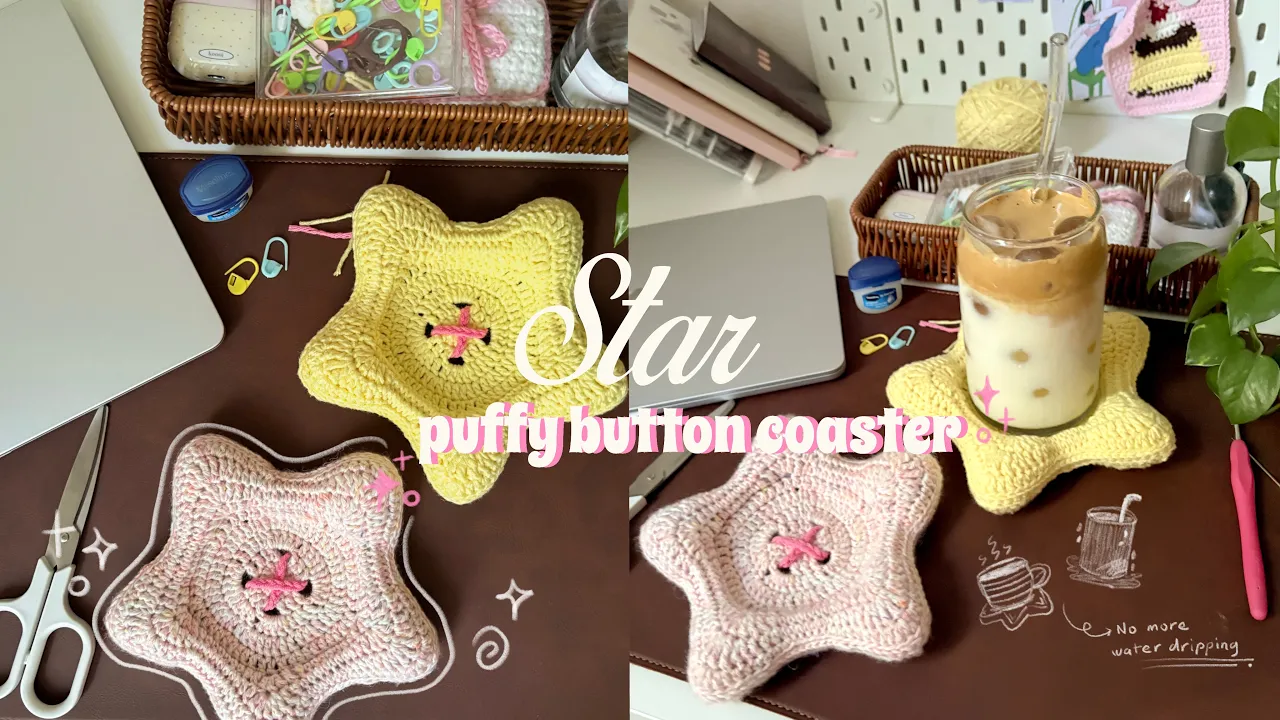
Star puffy button coaster (no sew, beginner-friendly)


Add a little stardust to your desk! Today, we are making these trendy, Puffy Star Button Coasters. They are squishy, functional, and beginner-friendly. We’re skipping the sewing needle entirely for this pattern and everything is worked right into the piece. Video guide is available down below to help my beginners angels <3
✿ Copyright
Please do not copy or redistribute this pattern as your own. This star puffy button coaster crochet pattern belongs to me, @mucie.studio. You may sell the finished items made using this pattern! Just please give me credit to help support me and my art. This will help me create more patterns for you in the future!
Watch the video below and crochet along with me! I recommend you watch the video while keeping the pattern open to make your crocheting process easier! <3
✿ Notes
‣ This pattern uses US terminology.
‣ Weave in any excess yarn.
‣ The number in between <xx> is the total number of stitches you should have by the end of the round.
✿ Materials
4-ply yarn (the smaller your yarn the smaller the coaster turned out)
you need two colors. One for the star and one for the X shape. Play around with the color!!
3.0mm crochet hook
Stitch marker
Scissors
Darning needle
Stuffing
✿ Stitches & Abbreviation
Ch: Chain
St(s): Stitches
Sc: Single crochet
Stacked single crochet (stsc): Insert a single crochet in the first stitch, insert your hook under the front vertical loop of that single crochet and yarn over and pull up a loop. Then, yarn over and pull through both loops.
Dc: Double crochet
Dc inc: Double crochet increase (insert 2dc in one stitch)
Hdc: Half double crochet
Tr: Treble crochet (yarn over 3 times and pull through 2 loops until you're left with one loop on your hook)
Sk: Skip the next stitch
Sl st: Slip stitch
✿ Star puffy button coaster crochet pattern ✿
Round 1: In a magic ring, ch 2, 12dc, sl st into the first stitch
Round 2: Ch1, stsc, 2dc, ch3, (3dc, ch3) x 3, sl st
Round 3: Ch1, stsc, dc inc, dc, 5dc in the chain 3 space of round 1, (dc, dc inc, dc, 5dc in the chain 3 space) x 3, sl st <36>
Round 4: Ch 1, stsc, dc inc, dc, (dc, dc inc, dc) x 11, sl st <48>
Round 5: Ch 1, stsc, 4dc, dc inc, (5dc, dc inc) x 6, 6 dc, sl st <55>
Round 6: Work only through the front loop (make sure to mark the back loop of the first stitch as this stitch in particular is really hard to find later) Ch 1, hdc, dc, 3dc in the same st, dc, hdc, 3sc,
(3sc, hdc, dc, 3dc in the same st, dc, hdc, 3sc) x 4, 3sc, sl st <65>
Round 7: Ch 1, sc, hdc, dc, 5dc in the same st, dc, hdc, 4sc,
(4sc, hdc, dc, 5dc in the same st, dc, hdc, 4sc) x 4, 3sc, sl st <85>
Round 8: Ch 1, sc, 2 hdc, dc, dc inc, 3tc in the same st, dc inc, dc, 2hdc, 4sc
(4sc, 2hdc, dc, dc inc, 3tc in the same st, dc inc, dc, 2hdc, 4sc) x 4 , 3sc, sl st
Round 9: Ch 1, 2sc, 4hdc, dc inc, (dc, tc, dc) in the same st, dc inc, 4hdc, 2sc, 3 sl st,
(3 sl st, 2sc, 4hdc, dc inc, (dc, tc, dc) in the same st, dc inc, 4hdc, 2sc, 3 sl st) x 4, 3 sl st, sl st into the first stitch
★ Fasten off by making a ch 1 and cut your yarn. Pull the end to tighten up the ch 1.
Repeat round 6 - 10 in the other side through the back loops that we leave on round 6. When working on this rounds, the front of your work should face you. This ensure the stitches placement are the same as the star front flap that we made.
IMPORTANT: DON'T CUT THE YARN FOR THE SECOND STAR FLAP.
Assembly:
You should have two flap (front and back). We will join these two together with a slip stitches.
Ch 1, and insert 1 sl st in each stitch (only through the inner loops). While doing so, stuff the star little by little as you crochet. As you move along and join it up, it will be hard to reach as there's little space to work with. So make sure to stuff it while you making the slip stitches.
Once you're done, weave in the excess yarn by inserting it multiple times into the star and cut your yarn. Leave about an inch of yarn. Poke in the excess into the puff.
X shape in the middle of the button:
Use a different yarn color to make it pop. Start with a slip knot and ch 22. Pull a long loop so it doesn't unravel and from the back insert the chain through any hole. Then, go through the another hole diagonally. Go through the next hole and bring the yarn forward and insert the yarn again diagonally. Make sure the chains fit tightly through these holes, if it's a little loose you can always unravel some of the chains. Now, bring the end through the long loop and pull. Basically you're creating a knot. Tie two more knot to secure it and cut the yarn as close as possible to the knots.
You're done!!
From creator
Hi! Haly here, well done finishing the pattern. I'm so proud of you 🩷 Thank you for visiting my site and give my pattern a lot of love. I won't be here if it's not for you!! If you create the pattern and post it on any social media please tag me @muciestudio I would love to see all your creations and you don't know happy I am seeing each one of your posts 🥹🫶🏻 Feel free to reach out if you have any questions, I would be happy to help!
Latest crochet pattern!


You saw. You came. You crocheted.
Thank you for visiting!
